What to Do With a Failed Project Car: 4 Smart Options

That project car sitting in your garage was supposed to be a labor of love. Maybe you ran out of time, money, or motivation. Maybe the rust was worse than you thought, or the parts you needed kept climbing in price. Whatever the reason, you’ve reached a tough decision: it’s time to let go.

The good news? You have more options than you might think. A failed project car still holds value, whether that’s in its scrap metal, its salvageable parts, or its potential to help someone else. The trick is choosing the path that makes the most sense for your situation.

This guide walks you through four practical ways to part with your project car—and helps you decide which one fits your goals, your budget, and your timeline.
Failed Project Car
Failed Project Car

Evaluating Your Options for a Failed Project Car

Before you make any moves, take an honest look at what you’re working with. Is the engine still functional? Are there desirable parts that collectors or restorers would want? How much space is the car taking up, and how soon do you need it gone?

Your answers will point you toward the right choice. A car with valuable components might be worth parting out. A rusted-out shell with little salvageable might be better suited for the scrap yard. Here’s a closer look at each option.

The Scrap Yard: Quick Cash for Your Car

Selling your car to a scrap yard is one of the fastest ways to clear it out and get paid. Scrap yards typically pay based on the weight of the vehicle and current metal prices, so you won’t get top dollar—but you will get a quick, hassle-free transaction.

This option works best if:

  • The car is no longer drivable or repairable
  • You don’t have the time or interest to sell individual parts
  • You need the space cleared quickly

Keep in mind that scrap prices fluctuate with the metals market. It’s worth calling a few yards to compare quotes before committing.

Parting It Out: Maximizing Value from Components

If your project car has desirable parts, selling them individually can earn you significantly more than scrapping the whole vehicle. Engines, transmissions, body panels, wheels, and even interior pieces can fetch solid prices from buyers searching for those exact components.

This route demands more effort. You’ll need to remove parts, photograph them, list them on marketplaces, and handle shipping or pickups. But for rare or in-demand models, the payoff can be worth the work.

Consider parting it out if:

  • Your car has sought-after or hard-to-find components
  • You have the tools and time to remove parts safely
  • You’re comfortable managing multiple sales

Once you’ve stripped the valuable car parts, you can still sell the remaining shell for scrap—giving you two streams of income from one car.

Donating Your Vehicle: A Charitable Choice

Donating your project car to a charity can be a rewarding option, especially if you’d rather do good than chase the highest payout. Many nonprofits accept vehicles in any condition and use the proceeds to fund their programs. In return, you may qualify for a tax deduction.

This choice makes sense if:

  • You care more about supporting a cause than earning cash
  • You want a simple process with free pickup
  • You can use a tax write-off

Be sure to choose a reputable charity and confirm the donation is tax-deductible. Keep all documentation for your records.

Upcycling and Creative Reuse: Giving Your Car a New Life

Not ready to say goodbye entirely? Upcycling lets you transform parts of your car into something new. Old car parts have found new life as furniture, garage décor, and even functional shop tools. A grille can become a wall display. Seats can be reupholstered into a couch. An engine block can serve as a coffee table base.

Upcycling is ideal if:

  • You’re creative and enjoy hands-on projects
  • You have sentimental attachment to the car
  • You want a unique piece for your home or shop

While this won’t put cash in your pocket, it keeps a piece of your project alive in a meaningful way.

Selling Your Totaled Vehicle to Zore’s Junk Cars: An Easy Solution

If you want the simplest path with the least hassle, selling your totaled project car to Zore’s Junk Cars in Indianapolis is hard to beat. We buy vehicles in any condition—running or not, complete or stripped.

Here’s what sets us apart:

  • Cash on the spot: You get paid immediately, no waiting around for checks or transfers.
  • Free towing: We come to you and haul the car away at no cost.
  • No haggling headaches: We make a fair offer based on your vehicle, plain and simple.

For many hobbyists, this is the easiest way to recover some value without the time and effort of parting out or scrapping the car yourself. Contact us today to get your free offer!

Frequently Asked Questions (FAQ)

How much is my project car worth as scrap?

Scrap value depends on the weight of your vehicle and the current price of metal. Most scrap cars sell for a few hundred dollars, though prices vary by location and market conditions. Call a few local yards to compare quotes.

Is it better to part out a car or sell it whole?

Parting out usually earns more money if your car has desirable components, but it takes considerable time and effort. Selling it whole is faster and simpler. If you value convenience over maximum profit, selling the whole car is the better choice.

Can I donate a car that doesn’t run?

Yes. Many charities accept vehicles in any condition, including those that no longer run. Confirm with the organization beforehand and ask whether they offer free pickup and a tax-deductible receipt.

Does Zore’s Junk Cars buy cars that don’t run?

Yes. Zore’s Junk Cars buys vehicles in any condition, whether they run or not. We offer cash on the spot and free towing throughout the Indianapolis area.

Making the Right Choice for Your Project Car

There’s no single right answer for what to do with a failed project car. Scrapping offers speed, parting out maximizes profit, donating supports a cause, and upcycling keeps a piece of your project alive. The best option comes down to your priorities—whether that’s cash, convenience, or creativity.

Take stock of your car’s condition, your available time, and what matters most to you. Once you know that, the decision gets a lot easier.

Ready to Sell Your Totaled Car?

Skip the stress and get paid today. Zore’s Junk Cars in Indianapolis pays cash on the spot and provides free towing for vehicles in any condition. Contact us now for a fair offer and clear that project car out of your garage for good.

Call for a Free Offer

Related Posts:

The Difference Between Rebuilt Car Titles and Salvaged Car Titles
Unlocking Value: Your Guide to Total Loss Vehicles and Auto Salvage
Essential Car Maintenance Tips for Old, High-Mileage Vehicles


How to Get a Duplicate Car Title in Indianapolis

Losing your car title is more than just frustrating—it can bring the sale, transfer, or scrapping of your vehicle to a complete stop. The good news? The Indiana Bureau of Motor Vehicles (BMV) makes replacing a lost, stolen, or damaged title a manageable process, whether you prefer to handle it online, in person, or by mail.

This guide walks you through every step of getting a duplicate car title in Indianapolis, including what documents you need, how much it costs, and what to do in more complex situations like liens or deceased owners.

Applying for a Duplicate Car Title in Indianapolis

Why Your Car Title Matters

Proof of Ownership

Your car title is the legal document that proves you own the vehicle. Without it, you cannot legally sell, transfer, donate, or scrap the car. Think of it like the deed to a house—it’s the one document you can’t afford to lose.

Essential for Selling or Transferring

Planning to sell your car, trade it in, or hand it down to a family member? The title must be signed over to the new owner for the transfer to be legally recognized. No title means no sale. That’s why replacing a lost one quickly is so important.

Who Is Eligible for a Duplicate Title in Indiana?

The Indiana BMV issues duplicate titles when an original title has been lost, stolen, mutilated, destroyed, or has become illegible. To qualify, you must be the registered owner on record with the BMV. Duplicate title transactions cannot be used to change ownership or remove a lien—those require separate processes.

One important note: duplicate titles cannot be processed on electronic titles.

What Documents Do You Need?

Before you begin the application process, gather the following:

  • Unexpired photo ID — Indiana driver’s license, state-issued ID, U.S. passport, military ID, or school ID
  • Vehicle Identification Number (VIN) — found on your dashboard or registration documents
  • Year, make, and model of your vehicle
  • Lien release (if applicable) — required if you previously paid off a loan and need to confirm no active lien exists
  • Completed State Form 205 — the Application for Certificate of Title for a Vehicle

Step-by-Step: Applying for a Duplicate Car Title in Indianapolis

Step 1: Gather Your Information

Start by locating your VIN. It’s typically printed on a metal plate on the driver’s side dashboard, visible through the windshield. You’ll also find it on your vehicle registration or insurance documents.

If your vehicle had a loan that’s been paid off, track down your lien release. Without it, the BMV may mail the duplicate title directly to the lienholder rather than to you.

Step 2: Complete State Form 205

Download the Application for Certificate of Title for a Vehicle – State Form 205 from the IN.gov website, or pick one up at any BMV branch. Fill it out carefully and completely. You’ll need to provide:

  • Your full legal name and current address
  • Vehicle details (VIN, year, make, model, and odometer reading)
  • The reason for the duplicate request (lost, stolen, or mutilated/destroyed)

If your original title was damaged, be prepared to surrender it when submitting the form.

Step 3: Choose Your Submission Method

Indianapolis residents have four options:

  1. Online at myBMV.com — Log in, go to the “Titles” section, select your vehicle, verify your details, and pay. This is the fastest method, though it’s unavailable if your address has changed or there’s a lien issue.
  2. At a BMV branch — Visit any local branch with your photo ID and Form 205. Staff will process your request on the spot.
  3. At a BMV Connect Kiosk — Scan your driver’s license, select “Duplicate Title,” and follow the prompts—no waiting in line.
  4. By U.S. Mail — Send your completed Form 205, a copy of your photo ID, a lien release (if applicable), and your payment to:

Indiana Bureau of Motor Vehicles
100 N. Senate Ave., Room N411
Indianapolis, IN 46204

Step 4: Pay the Fee

As of 2024, the standard fee for a duplicate title in Indiana is $15.00. If you need it faster, the BMV’s Speed Title service costs an additional $25.00 (total: $40.00) and is mailed via FedEx Ground or USPS Priority Mail.

Accepted payment methods vary by channel:

  • In-branch: Cash, check, or major credit/debit cards
  • Online: Credit/debit card or e-check
  • By mail: Check, cashier’s check, or money order (personal checks not accepted for out-of-state addresses)

Step 5: Receive Your Duplicate Title

Standard processing takes up to 21 calendar days. The title will arrive by mail and will be printed with the word “DUPLICATE” on its face. Once the duplicate is issued, the original title becomes void—if you ever find the original, destroy it immediately to prevent fraudulent use.

Special Situations to Know About

Out-of-State Applicants

If you’re an Indiana vehicle owner living outside the state, you can still apply by mail. Just note that personal checks from out-of-state addresses are not accepted—use a cashier’s check or money order instead.

Deceased Owner

If the registered owner has passed away, a standard duplicate title application is not the right route. The surviving party will typically need to bring a certified copy of the death certificate and, in some cases, Letters of Testamentary from the court to a BMV branch to initiate the appropriate title transfer process.

Correcting Errors on Your Title

If there’s a factual error on your current title—such as a misspelled name or incorrect VIN—you’ll need to file an Affidavit for Certificate of Title Correction (State Form 55582) rather than a duplicate title application. This form is available on the IN.gov website.

What If Your Car Is Totaled or Junk?

Sometimes people realize they’ve lost their title right when they’re trying to get rid of an old, non-running, or damaged vehicle. A junk car without a title can feel like a dead end—but it doesn’t have to be.

Zore’s Recycling buys junk cars across Central Indiana, offering free towing and cash paid on the spot. Whether your vehicle runs or not, Zore’s makes the process simple. Call 317-244-0700 today to get an offer and schedule your free pickup.

Frequently Asked Questions

How long does it take to get a duplicate title in Indiana?

Standard processing takes up to 21 calendar days from the date the BMV receives your application. If you need it sooner, the Speed Title service costs an additional $25.00 and significantly reduces the wait time.

Can I apply for a duplicate title online in Indiana?

Yes. You can apply through your myBMV.com account. Log in, go to the Titles section, and follow the prompts for a duplicate title request. This option is unavailable if your address has changed since your last registration or if there’s an active lien on the vehicle.

What if my car has a lien on it?

If there’s an active lien on the vehicle, the duplicate title will be sent directly to the lienholder—not to you. If you’ve paid off the loan but don’t have a lien release, contact your former lender to obtain one before applying.

What happens to my original title once a duplicate is issued?

The original title becomes legally void the moment the BMV issues a duplicate. If you later find the original, the Indiana BMV recommends destroying it to prevent any potential fraud or unauthorized transfers.

Get Your Title—Then Get Rid of That Old Car

Getting a duplicate car title in Indianapolis is a straightforward process once you know the steps. Gather your documents, complete State Form 205, choose your preferred submission method, and pay the $15.00 fee. For most applicants, the replacement title arrives within three weeks.

And if the reason you’re chasing down that title is to finally get rid of an old clunker—Zore’s Recycling is ready to help. Call 317-244-0700 to get a fast cash offer, free towing, and same-day payment. No hassle, no hidden fees—just cash in hand and one less headache in your driveway.

Call Now

Related Post: How to Sell a Junk Car with a Title in Indianapolis

Are Your Wheels Safe? How to Master the Penny Tire Tread Test

Driving on bald tires is a gamble no one should take. Your tires are the only point of contact between your vehicle and the road, meaning their condition directly impacts your ability to stop, steer, and stay safe in adverse weather. Yet, many drivers overlook this critical safety check until a mechanic points it out—or worse, until a blowout occurs.

Checking your tire health doesn’t require expensive diagnostic tools or a trip to the auto shop. In fact, you likely have the necessary equipment in your pocket right now. The “penny test” is a time-honored, simple method for checking your tire tread depth at home. By understanding how to perform this quick inspection, you can take control of your vehicle’s maintenance and ensure you aren’t putting yourself or your passengers at unnecessary risk.

Penny Tire Tread Test

What Is a Tire Tread Test?

A tire tread test is a diagnostic check used to measure the depth of the grooves on your tires. These grooves—the tread—are designed to channel water away from the tire, allowing the rubber to maintain a firm grip on the road surface.

When tires are new, this tread is deep and effective. However, as miles accumulate, the rubber wears down, and the grooves become shallower. Once the tread depth drops below a certain point, the tire loses its ability to displace water, significantly increasing the risk of hydroplaning and extending braking distances. Performing a tread test allows you to gauge whether your tires still have enough life left to perform safely or if they need immediate replacement.

Tools You Will Need

The beauty of this maintenance check lies in its simplicity. You don’t need to be a gearhead to get accurate results.

  • A Penny: The standard U.S. penny is the most common tool for this test.
  • A Quarter (Optional): If you want to check against stricter safety recommendations, a quarter can also be useful.
  • A Ruler or Tire Tread Depth Gauge (Optional): For those who prefer precise measurements over visual estimates, a dedicated gauge or a ruler capable of measuring in 32nds of an inch offers the most accuracy.

Step-by-Step Guide to the Penny Test

Checking your tires takes less than five minutes. Follow these steps to perform the test correctly.

1. Prep Your Vehicle

Park your car on a flat, level surface. Turn the steering wheel all the way to one side so that the front tires are angled out. This gives you easy access to the tread without having to crawl underneath the car.

2. Position the Penny

Take your penny and hold it between your thumb and forefinger. Position it so that Abraham Lincoln’s head is facing you and is upside down.

3. Insert into the Tread

Place the penny into one of the main grooves of your tire tread. Ensure the coin goes all the way to the base of the groove and isn’t resting on a pebble or debris.

4. Observe Lincoln’s Head

Look closely at where the tire tread meets the coin.

If the tread covers part of Lincoln’s head: Your tire tread is likely deeper than 2/32 of an inch, which is the legal minimum in most states.

If you can see the very top of Lincoln’s head: Your tread is worn down to 2/32 of an inch or less. This indicates the tire is legally worn out and unsafe.

5. Repeat the Process

Do not rely on a single measurement. Tires often wear unevenly due to alignment or inflation issues. Repeat the test in the outer grooves, the center grooves, and the inner grooves of the same tire. Then, move on to the other three tires.

Get Paid Cash for Your Old & Broken Car Parts Today

Interpreting Your Results

Understanding what you are looking at is just as important as the test itself. Tire tread depth is measured in 32nds of an inch. New passenger car tires typically start with a tread depth of 10/32″ to 11/32″. Here is how to interpret your findings:

The Danger Zone (2/32″ or less)

If you can see all of Lincoln’s head, your tires have reached the end of their lifespan. At 2/32 of an inch, tires are considered “bald” in many jurisdictions. The National Highway Traffic Safety Administration (NHTSA) recommends replacing tires immediately at this stage. Driving on tires in this condition is dangerous and illegal in most states.

The Caution Zone (4/32″ to 3/32″)

While 2/32″ is the legal limit, safety experts often recommend replacing tires before they get that bad. This is where the Quarter Test comes in. Insert a quarter upside down (Washington’s head). If the tread touches Washington’s head, you have at least 4/32″ remaining.

According to studies by AAA, wet stopping distances increase significantly when tread wears below 4/32″. If your tires pass the penny test but fail the quarter test, you should start budgeting for new tires soon, especially if you drive in rainy or snowy climates.

Additional Tips for Accurate Testing

To get the most out of your inspection, keep these tips in mind:

  • Check the Wear Bars: Modern tires have built-in “tread wear indicators.” These are small, raised bars of rubber located at the bottom of the tread grooves. When the tread wears down to be flush with these bars, the tire is at 2/32″ and needs replacement.
  • Look for Uneven Wear: If the center of the tire passes the penny test but the edges fail (or vice versa), you may have an tire inflation issue. Center wear usually suggests over-inflation, while edge wear suggests under-inflation.
  • Don’t Ignore Physical Damage: While checking the tread, look for cracks, bulges, or objects embedded in the sidewall. Good tread doesn’t matter if the sidewall is compromised.

Safety and Legal Implications

Driving on worn tires isn’t just a minor maintenance oversight; it is a significant safety hazard.

The Risk of Hydroplaning

Deep tread grooves are necessary to evacuate water from beneath the tire. When tread is shallow, water builds up, and the tire can eventually ride on top of the water rather than the road. This loss of traction is called hydroplaning, and it makes steering and braking nearly impossible.

Increased Stopping Distances

Tires with low tread take much longer to stop. AAA research indicates that worn tires can increase wet stopping distances by nearly 90 feet compared to new tires at highway speeds. In an emergency braking situation, that distance is the difference between a safe stop and a serious collision.

Legal Consequences

Beyond safety, there are legal ramifications. In many states, driving with tread below 2/32″ is a traffic violation that can result in fines. Furthermore, if you are involved in an accident and investigators determine your tires were bald, you could face liability issues or complications with insurance claims.

RECAP

Regular tire maintenance is one of the easiest ways to protect yourself and your family. A simple coin and a few minutes of your time can tell you exactly when you need to visit a tire shop. By catching wear early, you ensure your vehicle handles predictably and stops safely, no matter what the road throws at you. Don’t wait for a blowout to think about your tires—check them today.

Sometimes, a set of bad tires is just the tip of the iceberg. If your vehicle has more problems than just worn tread—like a failing engine, transmission slips, or extensive body damage—it might be time to move on.

If you have a junk car taking up space in your driveway, turn it into fast cash. We buy junk cars in Indianapolis, Indiana, regardless of their condition. Whether it’s running, wrecked, or rusted out, we offer competitive offers and hassle-free removal. Contact Us Today to get a quote and put money in your pocket!

Call for a Free Offer

Related Post: What You Need to Know About Your Car’s Tire Pressure Monitoring System

Protect Your Wallet: 5 Costly Car Repairs You Need to Know About

Owning a vehicle offers a sense of freedom and convenience that is hard to match. However, that freedom comes with a significant responsibility: maintenance. For many drivers, the sudden illumination of a “Check Engine” light or an unfamiliar clunking sound triggers an immediate sense of anxiety. This stress is often well-founded, as unexpected auto repairs can wreak havoc on a household budget.

While some wear and tear is inevitable, ignoring the early warning signs of mechanical distress can turn minor fixes into financial disasters. Understanding the mechanics of your vehicle isn’t just for hobbyists; it is a crucial part of financial planning.

By recognizing the symptoms of major system failures, you can often intervene before a part fails completely. Here are the five most expensive repair categories that every car owner should be aware of, along with the preventative measures that can keep your car—and your savings—running smoothly.

Call 317-450-3721 to Get a Free Offer From Our Totaled Car Scrappers in Indianapolis Indiana

Costly Automotive Issues That Can Be Avoided

1. Engine Issues: The Heart of the Vehicle

The engine is the most complex and vital component of your automobile. Because of its complexity and the precision required to fix it, engine repairs are almost always the most expensive service a mechanic performs.

Overheating

An engine operates at high temperatures, but it relies on a cooling system to keep those temperatures within a safe range. When this system fails—due to a leak, a broken water pump, or a stuck thermostat—the engine can overheat. If you continue driving an overheating car, the metal components can warp or crack. This often leads to a blown head gasket, a repair that involves stripping the engine down to its core.

Oil Leaks and Sludge

Oil is the lifeblood of your engine. It lubricates moving parts and reduces friction. If you skip oil changes, old oil turns into a thick sludge that clogs passages and starves the engine of lubrication. This leads to metal-on-metal contact, which can seize the engine entirely. Replacing a seized engine often costs thousands of dollars.

The Timing Belt

Often called the “silent killer” of engines, the timing belt synchronizes the rotation of the crankshaft and camshaft. If this belt snaps while the car is running, the pistons can crash into the valves. This catastrophic failure usually destroys the engine instantly. Check your owner’s manual for the recommended mileage to change this belt; it is a maintenance cost that prevents a much larger repair bill.

2. Transmission Troubles: The Gearbox

Your transmission is responsible for transferring power from the engine to the wheels. Whether you drive an automatic or a manual, the transmission contains hundreds of sophisticated parts working in unison. When things go wrong here, the labor costs alone can be staggering.

Slipping Gears

If you notice your engine revving high but the car isn’t accelerating, or if the vehicle shudders when shifting, your transmission may be slipping. This is often caused by wear and tear on the gears or internal clutch packs. Ignoring this sensation will eventually lead to a total loss of drive.

Fluid Leaks

Transmission fluid serves as both a lubricant and a hydraulic fluid. Red puddles under your car indicate a leak. Low fluid levels cause the system to overheat and grind. Unlike engine oil, transmission fluid doesn’t burn off; if it’s low, it leaked. Catching a leak early involves replacing a seal. Catching it late involves rebuilding or replacing the entire transmission.

Request Free Junk Car Removal in Central Indiana

3. Brake System Failures: Safety and Expense

Your brakes are your vehicle’s most critical safety feature. While routine brake jobs (changing pads) are standard maintenance, neglecting them leads to failures that compromise the entire system.

Worn Pads and Rotors

Brake pads are designed to wear down. However, once the pad material is gone, the metal backing plate grinds directly against the rotor. This creates a horrific screeching noise and deeply scores the metal rotors. Instead of a simple pad replacement, you are now paying for new rotors and potentially new calipers if the heat has caused them to seize.

Fluid Issues

Brake fluid is hygroscopic, meaning it absorbs moisture from the air over time. This water content can corrode the internal components of your brake lines and the master cylinder. If your brake pedal feels “spongy” or goes all the way to the floor, you may have a leak or air in the lines, requiring immediate professional attention.

4. Electrical Problems: The Nervous System

Modern cars are essentially rolling computers. The electrical system controls everything from your ignition to your power windows. Diagnosing electrical issues is notoriously difficult and time-consuming, meaning labor costs can pile up quickly.

The Alternator

While a dead battery is a common and relatively cheap fix, a bad alternator is different. The alternator charges the battery while the car is running. If it fails, your car will run off the battery until it dies completely, leaving you stranded. Replacing an alternator is labor-intensive because of its location in the engine bay.

Wiring and Sensors

Rodents chewing through wires or corrosion entering a connector can cause widespread system failures. A single damaged wire can disable your car’s safety systems or prevent it from starting. Because these wires are often buried behind dashboards or under upholstery, mechanics spend hours just locating the break.

5. Suspension and Steering: Comfort and Control

Your suspension system absorbs the impact of potholes and uneven roads, ensuring a smooth ride and responsive steering. When these components fail, it puts stress on other parts of the car, including the tires and transmission.

Shocks and Struts

These components limit the bounce of your vehicle. When they wear out, your tires lose contact with the road, making the car difficult to handle during braking or turning. Driving on bad struts also causes your tires to wear unevenly and rapidly, forcing you to replace tires much sooner than necessary.

Steering Components

If your steering wheel vibrates or makes a clunking noise when you turn, you may have issues with tie rods, ball joints, or the steering rack. Failure of these parts can result in a loss of steering control while driving, presenting a severe danger to you and others on the road.

When the Repair Bill Exceeds the Value

The best way to avoid these costly scenarios is through preventative maintenance. Adhering to your manufacturer’s service schedule helps you catch small issues before they become catastrophic failures. Finding a trusted mechanic who can explain repairs clearly and prioritize safety is invaluable.

However, there comes a point in every vehicle’s life when the cost of repairs outweighs the value of the car. If you are facing a blown engine, a slipping transmission, or a combination of major issues, pouring more money into the vehicle might not be the wisest financial decision.

If you are staring at a repair estimate that makes you wince, it might be time to cut your losses. You can sell your totaled or broken-down car for cash on the spot. We even provide free towing, removing the burden of transporting a non-running vehicle. Instead of draining your savings on a lost cause, turn that liability into cash today.

Call for a Free Junk Car Offer

Related Post: Automotive Problems That Are Heavy on Your Pocket

Is Your Older Car Guzzling Gas? Top Warning Signs to Watch For

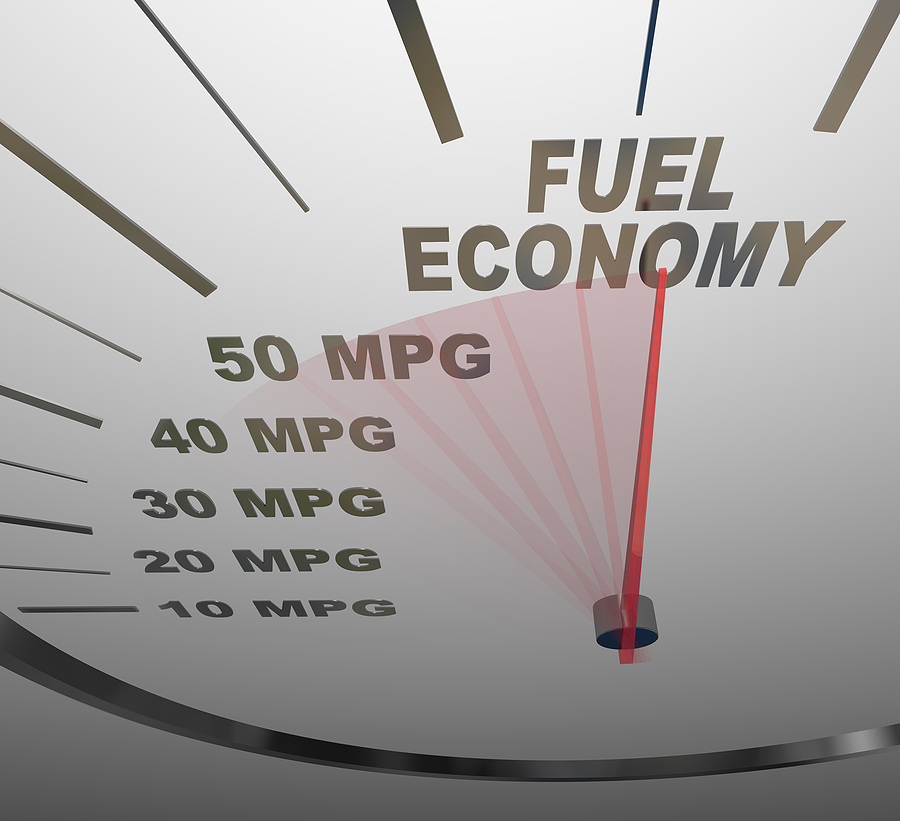
Your car’s fuel economy isn’t just about saving money at the pump—it’s a window into your vehicle’s overall health. When an older sedan, SUV, or light truck starts consuming more fuel than usual, it’s often signaling that something needs attention under the hood.

Understanding these warning signs can help you catch problems early, potentially saving hundreds of dollars in repairs. More importantly, recognizing when your vehicle has reached the end of its useful life can help you make informed decisions about whether to invest in costly repairs or explore other options.

This guide will walk you through the most common indicators of declining fuel efficiency, what causes them, and practical steps you can take to address these issues before they become expensive problems.

Call 317-450-3721 to Get a Free Offer From Our Auto Salvage Yard in Indianapolis

Common Signs Your Vehicle Is Losing Fuel Efficiency

Decreased Miles Per Gallon (MPG)

The most obvious sign of poor fuel efficiency is when your gas mileage drops noticeably from its typical range. If your SUV that normally gets 25 MPG is suddenly struggling to reach 20 MPG, something has changed.

Keep track of your fuel consumption over several fill-ups to establish a clear pattern. A gradual decline over time is normal as vehicles age, but sudden drops of 10% or more warrant investigation.

More Frequent Gas Station Visits

You’ll likely notice this change before you calculate the exact numbers. If you find yourself filling up more often than usual while maintaining similar driving habits, your vehicle’s fuel system may be struggling.

Unusual Engine Noises and Performance Issues

Several sounds can indicate fuel efficiency problems:

  • Knocking or pinging sounds during acceleration often signal improper fuel combustion
  • Rough idling may indicate fuel delivery issues
  • Hesitation or stuttering during acceleration suggests the engine isn’t getting the right fuel-air mixture

Dark or Unusual Exhaust Smoke

Your exhaust can tell you a lot about fuel combustion:

  • Black smoke typically indicates too much fuel in the mixture
  • Blue smoke suggests oil burning, which affects fuel efficiency
  • White smoke (beyond normal condensation) may signal coolant issues affecting engine performance

Check Engine Light Activation

Modern vehicles use sensors to monitor fuel efficiency continuously. When the check engine light comes on, it often indicates issues that directly impact gas mileage, such as faulty oxygen sensors or catalytic converter problems.

What Causes Poor Fuel Efficiency in Older Vehicles

Air Filter and Intake Issues

A dirty air filter restricts airflow to the engine, forcing it to work harder and consume more fuel. In older vehicles, the mass air flow sensor can also become contaminated, sending incorrect readings to the engine’s computer.

Tire Problems

Under-inflated or worn tires create additional rolling resistance. Even a 10 PSI drop in tire pressure can reduce fuel economy by a measurable amount. Misaligned wheels also force the engine to work harder to maintain speed.

Fuel System Components

Several fuel system parts commonly fail in older vehicles:

  • Fuel injectors can become clogged with deposits, affecting fuel delivery
  • Oxygen sensors may provide inaccurate readings, leading to improper fuel mixtures
  • The catalytic converter can become less efficient at processing exhaust gases

Engine Maintenance Issues

Worn spark plugs don’t ignite fuel efficiently, leading to incomplete combustion. Old engine oil creates more friction, requiring additional energy to overcome resistance.

Simple DIY Checks and Maintenance Tasks

Easy Tasks (5-10 minutes)

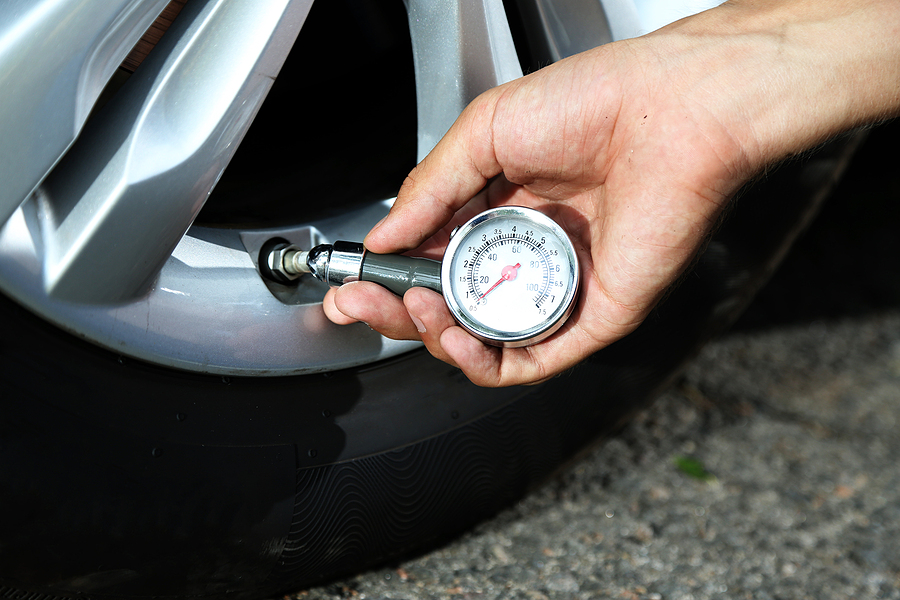
  • Check Tire Pressure: Use a tire pressure gauge when tires are cool. Inflate to the pressure listed on your door jamb sticker, not the maximum pressure on the tire sidewall.
  • Inspect the Air Filter: Remove the air filter housing and examine the filter. If it looks dirty or clogged with debris, replacement is needed. Most filters cost $10-20 and take minutes to replace.
  • Visual Inspection of Exhaust: Look for unusual smoke colors during startup and while idling.

Moderate Tasks (30-60 minutes)

  • Clean the Mass Air Flow Sensor: Disconnect the sensor (usually located between the air filter and throttle body) and clean it with specialized MAF cleaner spray. Allow it to dry completely before reinstalling.
  • Check Spark Plugs: Remove one spark plug to examine its condition. Worn or fouled plugs should be replaced as a set. This task requires basic tools and some mechanical knowledge.
  • Engine Oil Change: Fresh oil reduces internal friction and helps maintain optimal fuel economy. Follow your vehicle’s recommended oil change intervals.

Safety Reminders

Always ensure your vehicle is parked on level ground with the engine cool before beginning maintenance. Wear safety glasses and gloves when working with automotive fluids or components.

Get Your Junk Vehicle Appraised for Free Today!

When Professional Help Is Necessary

Some fuel efficiency issues require professional diagnosis and repair. Consider visiting a qualified mechanic when you encounter:

  • Persistent check engine lights that don’t clear after basic maintenance
  • Complex fuel system problems requiring diagnostic equipment
  • Catalytic converter or emissions system issues
  • Engine performance problems that don’t respond to simple fixes

Estimated Professional Repair Costs

Understanding potential repair costs helps you make informed decisions:

  • Oxygen Sensor Replacement: $150 – $300
  • Catalytic Converter Replacement: $300 – $1,200
  • Fuel Injector Cleaning or Replacement: $100 – $400
  • Spark Plug Replacement: $80 – $250
  • Tire Replacement: $100 – $300 per tire

When to Consider Scrapping Your Vehicle

Sometimes the most economical decision is letting go of an older vehicle rather than investing in expensive repairs. Consider scrap car disposal when:

  • Repair costs exceed 50% of your vehicle’s current value
  • Multiple systems are failing simultaneously
  • Your car has been declared a total loss by insurance
  • You have an uninsured vehicle with significant mechanical problems

Understanding Junk Car Scrap Values

Auto salvage yards pay for vehicles based on their weight and material composition:

  • Sedans: Typically range from $100 to $400
  • SUVs: Generally fetch between $200 and $500 due to their larger size
  • Light Trucks: Often yield $250 to $600, reflecting their robust build and higher material content

Scrap values depend on current market prices for scrap metal and can vary by location. Even non-running vehicles have value for their materials and usable parts.

The Scrapping Process

Working with a reputable auto salvage yard is straightforward. Most yards provide free towing and handle the necessary paperwork for title transfer. This option is particularly valuable for total loss vehicles or cars with expired registration where traditional selling methods aren’t practical.

Frequently Asked Questions

How often should I check my fuel efficiency?

Monitor your MPG every few fill-ups to establish baseline performance. Calculate it manually by dividing miles driven by gallons purchased for the most accurate readings.

Can I improve fuel efficiency without major repairs?

Yes, basic maintenance like keeping tires properly inflated, replacing air filters, and using quality fuel can improve efficiency by 5-15% in many cases.

How do I know if repairs are worth the investment?

Compare total repair costs to your vehicle’s current market value. If repairs exceed 50-75% of the car’s worth, consider your alternatives carefully.

What paperwork do I need to scrap my vehicle?

You’ll typically need the vehicle title and a valid ID. Some states require additional forms, so check with your local auto salvage yard for specific requirements.

RECAP

Poor fuel efficiency doesn’t have to drain your wallet indefinitely. Start with simple maintenance tasks like checking tire pressure and replacing your air filter. These basic steps often yield immediate improvements in gas mileage.

For more complex issues, obtain professional estimates before committing to repairs. Remember that older vehicles with multiple problems may be better candidates for responsible disposal rather than costly repairs.

If your car has reached the end of its useful life, don’t let it sit unused in your driveway. Get a free, no-obligation quote for scrapping your old vehicle at a reputable auto salvage yard. You’ll free up space while putting some cash back in your pocket—money you can put toward a more fuel-efficient replacement.

Call Now for Your Free Offer

Related Post: Automotive Problems That Are Heavy on Your Pocket

What Your Car Dashboard Lights Are Warning You Of

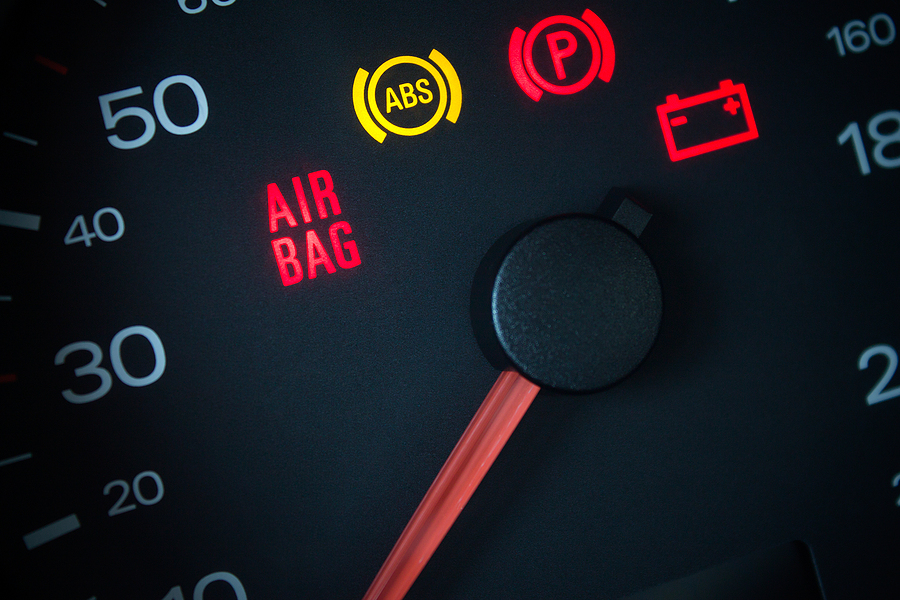
Your car’s dashboard is more than just a speedometer and a fuel gauge. It’s the central communication hub for your vehicle. Those little symbols that light up are your car’s way of telling you something important. Ignoring these dashboard warning lights can lead to expensive repairs or, even worse, compromise your safety on the road.

Understanding these signals is a crucial part of responsible car ownership. This guide will walk you through the most common car warning lights, explain what their colors mean, and provide actionable steps you can take. Knowing what to do when a light comes on can save you time, money, and give you peace of mind behind the wheel.

Call 317-450-3721 to Scrap a Junk Car in Indianapolis

Decoding the Colors of Your Dashboard

Dashboard lights use a color-coded system, similar to a traffic light, to communicate the urgency of the issue.

Red: A red warning light signals a serious problem that requires your immediate attention. If you see a red light, it’s best to pull over safely as soon as possible and investigate the cause. Driving with a critical red light on can lead to severe vehicle damage or a safety hazard.

Yellow/Amber: A yellow or amber light indicates a potential issue that needs to be addressed soon. While it might not require an immediate stop, you shouldn’t ignore it. Think of it as a “check soon” notification.

Green/Blue: These lights are typically informational. They indicate that a particular system, like your headlights or cruise control, is active and working as intended. No action is needed.

A flashing light, regardless of color, usually signifies a more urgent problem than a solid one. For example, a flashing “Check Engine Light” often indicates a severe engine misfire that could damage your catalytic converter.

Critical Warning Lights: Must Act Immediately

These red lights signal a problem that could cause serious damage or pose a safety risk. Stop your vehicle as soon as it is safe to do so.

Oil Pressure Light

This light, which looks like an old-fashioned oil can, indicates a loss of oil pressure. This is one of the most serious warnings your car can give. Oil is essential for lubricating your engine’s moving parts, and without proper pressure, your engine can quickly suffer catastrophic damage.

What to do:

Pull over and turn off the engine immediately. Check your oil level using the dipstick. If the level is low, adding more oil might solve the problem temporarily, but you should still have the system checked for leaks. If the oil level is fine, the issue could be a faulty oil pump or sensor, and you should have your vehicle towed to a mechanic.

Engine Temperature Light

Shaped like a thermometer dipped in liquid, this light warns you that your engine is overheating. This can be caused by low coolant levels, a malfunctioning cooling fan, or a leak in the cooling system. An overheating engine can lead to a cracked engine block or a blown head gasket—both are very expensive repairs.

What to do:

Pull over and shut off the engine. Let it cool down for at least 15-20 minutes before attempting to open the hood to avoid burns. Check the coolant reservoir. If it’s low, you can add more coolant once the engine has cooled. However, an overheating engine often signals an underlying problem that requires professional diagnosis.

Junk an Old, Broken Down Car for Cash!

Urgent Warning Lights: Address Promptly

These yellow or amber lights indicate a problem that needs attention but may not require you to stop immediately.

Check Engine Light

This light can signal anything from a loose gas cap to a serious engine problem. It’s one of the most common car warning lights.

What to do:

  1. First, ensure your gas cap is tightened securely. A loose cap can trigger this light.
  2. Note any changes in your car’s performance, like rough idling or reduced power.
  3. If the light is flashing, pull over and call for a tow. A flashing light indicates a severe misfire.
  4. If the light is solid, you can continue driving but should get it checked by a mechanic as soon as possible. An OBD-II scanner can help identify the specific problem.

Battery Light

The battery light indicates an issue with the vehicle’s charging system, not necessarily the battery itself. The problem could be a failing alternator, a damaged battery cable, or a worn-out serpentine belt.

What to do:

  1. Turn off non-essential electronics like the radio and air conditioning to conserve battery power.
  2. Head straight to a mechanic or an auto parts store. Your car is running on battery power alone, which won’t last long.
  3. Check that the battery terminals are clean and tight.

Brake System Light

This light could mean your parking brake is on. If it stays on after you’ve released the brake, it could signal low brake fluid or a more serious issue with the brake system.

What to do

First, double-check that your parking brake is fully disengaged. If the light remains on, have your brake system inspected by a professional immediately. Brake issues are a major safety concern.

Power Steering Light

This light, often an exclamation point next to a steering wheel, indicates a problem with the power steering system. You might find the steering wheel becomes very difficult to turn.

What to do:

Check the power steering fluid level and top it off if it’s low. If the fluid level is fine, or if steering remains difficult, you need professional service. Driving without power steering is possible but challenging, especially at low speeds.

Informational and System Lights

These lights are usually not a cause for panic but provide important information.

  • Tire Pressure Monitoring System (TPMS): This light means the pressure in one or more of your tires is too low. Check your tire pressure and inflate them to the recommended PSI.
  • Anti-lock Brake System (ABS): This indicates a problem with the ABS. Your regular brakes will still work, but the anti-lock feature will not. Get it checked soon.
  • Traction Control Light: This light will flash when the traction control system is actively helping you maintain grip on a slippery road. If it stays on, it indicates a fault in the system.
  • Airbag Light: This light means there’s a fault in the airbag system. It requires immediate attention, as your airbags may not deploy in an accident.
  • Low Fuel Indicator: This one is straightforward—you’re running low on gas and should find a station soon.

DIY Diagnosis with an OBD-II Scanner

For those who want to take a more hands-on approach, an On-Board Diagnostics (OBD-II) scanner is a valuable tool. Since 1996, all cars have been equipped with an OBD-II port, usually located under the dashboard on the driver’s side.

How it works:

When the Check Engine Light comes on, the car’s computer stores a Diagnostic Trouble Code (DTC) that corresponds to a specific problem. An OBD-II scanner reads this code.

How to use it:

Simply plug the scanner into the port, turn the ignition to the “On” position, and follow the scanner’s instructions to retrieve the code. You can then look up the code’s meaning online or in the scanner’s manual.

Limitations:

A scanner tells you what system is failing, but not necessarily why. For example, a code might indicate an oxygen sensor failure, but the root cause could be a vacuum leak. It’s a great starting point, but complex issues still require a mechanic’s expertise.

Preventive Maintenance: The Best Fix

The most effective way to deal with dashboard warning lights is to prevent them from coming on in the first place. Regular maintenance is key.

  • Check fluids regularly: This includes engine oil, coolant, brake fluid, and power steering fluid.
  • Monitor tire pressure: Check your tire pressure monthly.
  • Follow your service schedule: Adhere to your manufacturer’s recommendations for oil changes, brake inspections, and tire rotations.
  • Inspect wipers and lights: Ensure all lights are working and your wipers provide a clear view.

Drive with Confidence

Your car’s dashboard lights are designed to keep you safe and your vehicle running smoothly. By understanding what they mean and taking prompt action, you can address small issues before they become major problems. Paying attention to these warnings ensures your car remains reliable and safe for every journey.

For more helpful guides on vehicle care, read more of our car care blogs and empower yourself with knowledge. Got a scrap car or junk auto parts to sell? We pay cash on the spot, so call today to get your free offer!

Call Now to Junk a Car

Related Post: What Your Car’s Dashboard Lights Mean and Why You Should Care

Automotive Problems That Are Heavy on Your Pocket

Car ownership comes with its fair share of joys—the freedom of the open road, the convenience of personal transportation, and the pride of owning your vehicle. However, it also brings the inevitable reality of maintenance and repairs. While regular upkeep is expected, some automotive problems can deliver a financial blow that leaves your wallet significantly lighter.

Understanding which car problems carry the highest repair costs can help you prepare financially and make informed decisions about your vehicle’s future. Some issues are so expensive that they can transform your reliable transportation into what feels like a money pit overnight. The key lies in recognizing these potential problems early and taking preventative measures to avoid them altogether.

When car repair costs exceed your vehicle’s value, you’re faced with a difficult decision: invest in expensive repairs or consider alternative options. This comprehensive guide will walk you through the most costly automotive problems, provide strategies for prevention, and help you understand when it might be time to scrap junk car rather than continue pouring money into repairs.

Call 317-450-3721 to Scrap a Car for Instant Cash in Indianapolis

Auto Repair Problems That Can Break the Bank

Engine Problems: The Heart of Expensive Repairs

Your engine represents the most critical—and potentially most expensive—component of your vehicle. When engine problems arise, auto repair bills can quickly escalate into thousands of dollars, making even minor issues feel overwhelming.

Head Gasket Failure

Head gasket failure ranks among the most dreaded engine problems for good reason. This critical component seals the combustion chambers and prevents coolant from mixing with engine oil. When it fails, you’ll notice white smoke from the exhaust, milky oil, or rapid coolant loss.

The Subaru Impreza serves as a prime example of how expensive this repair can become. Head gasket replacement typically costs between $1,500 and $2,500, depending on labor rates and additional complications discovered during repair. This substantial investment often exceeds the value of older vehicles, creating a challenging financial decision for owners.

Timing Belt Catastrophe

Timing belt failure can transform a routine maintenance item into a catastrophic engine problem. In interference engines, a broken timing belt allows pistons and valves to collide, causing extensive internal damage that requires complete engine rebuilding or replacement.

Prevention becomes crucial here, as timing belt replacement costs a few hundred dollars compared to several thousand for engine reconstruction. Regular inspection and replacement according to manufacturer recommendations can save you from this expensive automotive nightmare.

Transmission Issues: Power Transfer Problems

Transmission problems represent another category of car problems that can devastate your budget. Whether automatic or manual, transmission repairs require specialized knowledge and expensive components that drive up repair costs significantly.

Automatic Transmission Failure

Automatic transmissions contain hundreds of precisely engineered components working in harmony. When major components fail, complete transmission replacement often becomes necessary rather than attempting piecemeal repairs.

Consider the Honda Accord, a typically reliable vehicle that can still face transmission issues. Complete transmission replacement ranges from $3,000 to $5,000, representing a substantial portion of many vehicles’ total value. This expense often forces owners to evaluate whether continued ownership makes financial sense.

Manual Transmission Complications

While generally more reliable than automatic transmissions, manual transmissions aren’t immune to expensive failures. Clutch replacement, synchronizer problems, and gear wear can create significant repair bills, though typically less severe than automatic transmission replacement.

Catalytic Converter Failure: Environmental Protection Comes at a Price

The catalytic converter plays a crucial role in reducing harmful emissions, but its replacement cost can shock unprepared vehicle owners. This component uses precious metals to convert toxic gases into less harmful substances, making replacement parts expensive.

Symptoms and Replacement Costs

Catalytic converter failure often manifests through reduced acceleration, poor fuel economy, and failed emissions tests. The Toyota Prius, known for fuel efficiency, faces particularly high replacement costs due to its sophisticated emissions system. Catalytic converter replacement typically ranges from $1,200 to $2,500, making it one of the more expensive single-component repairs.

Theft has also become a growing concern, as thieves target catalytic converters for their valuable metals, leaving owners facing unexpected replacement costs even on otherwise functional vehicles.

Electrical System Issues: Modern Complexity Creates Expensive Problems

Modern vehicles rely heavily on complex electrical systems that can create frustrating and expensive repair scenarios. Unlike mechanical components that often show clear signs of wear, electrical problems can be intermittent and difficult to diagnose.

Battery and Charging System Problems

While battery replacement represents a relatively minor expense, charging system failures can become more costly. Alternator failure affects your vehicle’s ability to maintain electrical power and charge the battery while driving.

The Ford F-150, America’s best-selling truck, demonstrates typical alternator replacement costs ranging from $500 to $800. When combined with diagnostic time and potential related electrical damage, these repairs can quickly escalate beyond initial estimates.

Complex Wiring Issues

Modern vehicles contain miles of wiring connecting numerous electronic modules and sensors. Wiring problems can create intermittent issues that require extensive diagnostic time, driving up labor costs even for relatively simple repairs.

Sell Your Old, Beat Up Car Today!

Preventative Measures: Your Best Defense Against Expensive Repairs

Preventative car maintenance represents your most effective strategy for avoiding catastrophic repair bills. Regular maintenance might seem expensive in the short term, but it pales in comparison to major component replacement costs.

Essential Maintenance Practices

Regular Oil Changes form the foundation of engine protection. Following manufacturer-recommended intervals keeps your engine properly lubricated and prevents overheating damage that leads to expensive repairs.

Fluid Maintenance extends beyond engine oil to include transmission fluid, coolant, brake fluid, and power steering fluid. Each fluid serves a specific purpose, and neglecting any of them can result in component failure and expensive repairs.

Belt and Hose Inspection can prevent roadside breakdowns and component damage. Cracked or worn belts and hoses should be replaced promptly to avoid more extensive damage when they fail completely.

Battery Maintenance includes keeping terminals clean and testing voltage periodically. A failing charging system can damage expensive electronic components throughout your vehicle.

Proactive Problem Detection

Address Issues Promptly when warning lights illuminate or unusual noises develop. Early intervention often prevents minor problems from escalating into major repairs that strain your budget.

Follow Maintenance Schedules religiously, particularly for timing belt replacement and major service intervals. Manufacturer recommendations exist to prevent expensive failures, not generate unnecessary service revenue.

Use Quality Parts when repairs become necessary. While aftermarket parts might cost less initially, quality OEM or premium aftermarket components often provide better long-term value and reliability.

When Repairs Exceed Vehicle Value: Considering Your Options

Sometimes car repair costs exceed your vehicle’s value, creating a total loss situation similar to insurance claims. When a $3,000 repair estimate arrives for a $2,000 vehicle, continuing with repairs rarely makes financial sense.

Evaluating Total Loss Scenarios

Several factors influence this decision beyond simple repair cost versus vehicle value comparisons. Consider your vehicle’s reliability history, expected future repairs, and your transportation needs when making this difficult choice.

If you decide repairs aren’t worthwhile, you might consider options to scrap a junk car for a cash payment. This approach allows you to recover some value from your vehicle while avoiding expensive repairs that exceed its worth.

Understanding Scrap Value

Scrap value depends primarily on your vehicle’s weight and recyclable materials, including steel, aluminum, and copper components. Market demand for scrap metal influences pricing, as does your geographic location and local processing capabilities.

Complete vehicles with all major components typically command better scrap prices, even when those components no longer function properly. Catalytic converters and other valuable components can significantly increase your vehicle’s scrap value.

The Scrapping Process

Getting Quotes from multiple scrap yards ensures you receive fair market value for your vehicle. Prices can vary significantly between different yards and locations.

Documentation Preparation includes gathering your title or proof of ownership, as legitimate scrap yards require proper documentation for all transactions.

Vehicle Preparation involves removing personal items and preparing for pickup or delivery to the scrap yard.

Finalizing the Sale includes completing required paperwork, arranging towing if necessary, and receiving payment for your vehicle.

DMV Notification prevents future liability by officially transferring ownership and removing the vehicle from your registration records.

RECAP

Car ownership doesn’t have to mean facing unexpected financial disasters from expensive repairs. Staying proactive with regular maintenance significantly reduces the risk of facing hefty auto repair bills that can strain your budget and disrupt your financial plans.

Understanding which problems carry the highest costs helps you make informed decisions about repairs, maintenance priorities, and when to consider alternative options. Whether you choose to invest in repairs or explore options to scrap your vehicle, knowledge empowers you to make decisions that align with your financial situation and transportation needs.

Remember that prevention costs far less than major repairs, and early detection often transforms expensive problems into manageable maintenance items. By staying vigilant about your vehicle’s condition and addressing issues promptly, you can enjoy reliable transportation without the fear of unexpected financial burdens.

Looking to get rid of an old car before buying another one? We’ll pay in cash and remove it for free! Contact Zore’s Junk Cars at 317-450-3721 today and sell your scrap vehicle for instant cash.

Get a Free Quote for Your Old Car

Related Post: Essential Car Maintenance Tips for Old, High-Mileage Vehicles

What You Need to Know About Your Car’s Tire Pressure Monitoring System

That small warning light on your dashboard isn’t just another gadget—it’s your tire pressure monitoring system (TPMS) working to keep you safe on the road. While many drivers notice this light occasionally flicker on, few understand the sophisticated technology behind it or why proper tire pressure is so critical for vehicle safety and performance.

Your car’s TPMS serves as an early warning system, alerting you when tire pressure drops below safe levels. This technology has prevented countless accidents and saved drivers from the inconvenience and danger of unexpected flat tires. However, like any automotive system, TPMS requires understanding and maintenance to function effectively.

Understanding how your tire pressure monitoring system works, recognizing common issues, and knowing when to seek professional help can save you money, improve your vehicle’s performance, and most importantly, keep you safe on the road.

Call 317-450-3721 to Get Started With Auto Parts Recycling in Indianapolis

What is TPMS and Why is it Important?

The tire pressure monitoring system is a safety feature that monitors the air pressure in your vehicle’s tires and alerts you when pressure drops significantly below the recommended level. Since 2007, federal law has required all passenger vehicles sold in the United States to include TPMS as standard equipment.

This technology exists because underinflated tires pose serious risks. When tires lack proper air pressure, they generate excessive heat, wear unevenly, and can experience sudden failure. The National Highway Traffic Safety Administration estimates that TPMS prevents hundreds of deaths and thousands of injuries annually by alerting drivers to potentially dangerous tire conditions before they become critical.

Proper tire pressure also affects your vehicle’s fuel efficiency, handling, and braking performance. Even a small decrease in tire pressure can reduce fuel economy and compromise your ability to control the vehicle, especially during emergency maneuvers.

Types of TPMS: Direct vs. Indirect

Modern vehicles use one of two TPMS technologies, each with distinct advantages and limitations. Understanding which type your vehicle uses helps you better maintain the system and troubleshoot potential issues.

How Does Direct TPMS Work?

Direct tire pressure monitoring systems use individual sensors mounted inside each wheel to measure actual air pressure and temperature. These sensors transmit real-time data wirelessly to your vehicle’s computer system, which processes the information and displays warnings when pressure drops below predetermined thresholds.

Direct TPMS sensors are typically mounted on the tire valve stem or attached to the wheel rim. Each sensor contains a battery, pressure sensor, temperature sensor, and radio transmitter. When you start your vehicle, the sensors activate and begin sending pressure readings to the central monitoring system.

This type of system provides precise, real-time pressure readings for each individual tire. You’ll know exactly which tire needs attention and can monitor gradual pressure changes over time.

How Does Indirect TPMS Work?

Indirect systems don’t measure tire pressure directly. Instead, they monitor wheel speed using your vehicle’s existing anti-lock brake system (ABS) sensors. When a tire loses pressure, its diameter decreases slightly, causing it to rotate faster than properly inflated tires.

The system’s computer compares rotational speeds among all four tires and triggers a warning when it detects significant differences that indicate underinflation. While this approach costs less to manufacture and maintain, it’s less precise than direct measurement and requires recalibration whenever you adjust tire pressure or rotate tires.

Indirect TPMS cannot identify which specific tire has low pressure, only that one or more tires may be underinflated. This limitation can make troubleshooting more challenging for drivers.

How to Sell Junk Car Parts for Cash

Benefits of Maintaining Proper Tire Pressure

Keeping your tires properly inflated delivers multiple benefits that extend beyond basic safety considerations. Understanding these advantages motivates consistent tire pressure maintenance and helps you recognize the true value of a functioning TPMS.

Improved Fuel Efficiency

Underinflated tires increase rolling resistance, forcing your engine to work harder and consume more fuel. The Department of Energy estimates that properly inflated tires can improve fuel economy by up to 3%. For the average driver, this translates to meaningful savings at the gas pump over time.

Even slight underinflation affects efficiency. Tires just 7.5 PSI below recommended pressure can reduce fuel economy by 2.8%. Your TPMS helps maintain optimal pressure levels, ensuring you get the best possible mileage from every gallon.

Enhanced Safety and Handling

Proper tire pressure directly impacts your vehicle’s handling characteristics, braking distance, and stability. Underinflated tires provide less responsive steering, longer stopping distances, and reduced cornering grip. Over-inflated tires create a harsh ride and reduce the tire’s contact patch with the road.

Maintaining correct pressure ensures optimal tire performance during normal driving and emergency situations. Your TPMS serves as a constant guardian, monitoring pressure levels so you can address issues before they compromise safety.

Extended Tire Life

Incorrect tire pressure causes uneven wear patterns that significantly reduce tire lifespan. Underinflated tires wear excessively on the outer edges, while over-inflated tires develop center wear. Both conditions can cut tire life in half or worse.

By alerting you to pressure changes, TPMS helps maintain even wear patterns and maximize your tire investment. Replacing tires prematurely due to pressure-related wear represents a substantial unnecessary expense.

Troubleshooting Common TPMS Issues

Even well-designed systems occasionally experience problems that require attention. Understanding common TPMS issues helps you distinguish between urgent safety concerns and minor maintenance needs.

TPMS Warning Light Stays On

A continuously illuminated TPMS warning light typically indicates low tire pressure in one or more tires. Start by checking all tire pressures with a reliable tire pressure gauge, including your spare tire if equipped with a sensor.

If all pressures are correct but the light remains on, you may have a failing sensor, dead sensor battery, or system malfunction. Temperature changes can also trigger warnings as tire pressure fluctuates with ambient temperature—typically losing 1-2 PSI for every 10-degree temperature drop.

False TPMS Readings

Occasional false readings can result from electromagnetic interference, sensor battery degradation, or system calibration issues. If you consistently receive warnings despite verified proper tire pressure, professional diagnosis may be necessary.

Weather changes often trigger temporary TPMS warnings. Cold weather naturally reduces tire pressure, while hot weather can cause pressure increases that may temporarily confuse indirect systems during recalibration periods.

Replacing TPMS Sensors

TPMS sensors contain batteries designed to last 5-10 years, depending on usage patterns and environmental conditions. When sensor batteries die, replacement becomes necessary to maintain system functionality.

When to Replace TPMS Sensors

Replace sensors when they fail to transmit pressure data, consistently provide inaccurate readings, or when the system displays sensor malfunction warnings. Many drivers discover sensor failures during routine tire service when technicians attempt to reset the system.

Sensor replacement often coincides with new tire installation, making it a convenient time to refresh aging TPMS components. Proactive replacement prevents the inconvenience of sensor failure between service intervals.

DIY vs. Professional Installation

While mechanically inclined drivers can replace sensors themselves, professional installation is often more practical. Sensor replacement requires tire removal, proper torque specifications, and system relearning procedures that vary by vehicle manufacturer.

Professional technicians have specialized tools for sensor programming and system initialization. They can also identify compatibility issues and ensure proper sensor operation before you leave the shop.

Tips for Maintaining Your TPMS

Proper TPMS maintenance involves both tire care and system-specific considerations. Regular attention keeps your monitoring system functioning reliably and extends sensor life.

Regular Tire Pressure Checks

Check tire pressure monthly using an accurate tire pressure gauge, even with functioning TPMS. Systems typically warn when pressure drops 25% below recommended levels—significant underinflation that’s better prevented than corrected.

Temperature changes affect tire pressure predictably. Check pressures when tires are cold, before driving or after sitting for several hours. Hot tires provide inflated readings that don’t reflect actual cold pressures.

Proper Tire Inflation Techniques

Use manufacturer-recommended pressures found on the door jamb sticker or owner’s manual—not the maximum pressure printed on tire sidewalls. Inflate tires when cold to ensure accurate pressure settings.

After adjusting tire pressure, drive a few miles to allow the TPMS to register new pressure levels. Most systems require brief driving periods to update readings and clear warning lights.

Final Thoughts

Your tire pressure monitoring system represents sophisticated technology designed to enhance safety and vehicle performance. Understanding how it works, recognizing common issues, and maintaining proper tire pressure helps you maximize these benefits while avoiding unexpected problems.

Regular tire pressure maintenance, combined with attention to TPMS warning signals, creates a proactive approach to tire care that saves money and ensures safe driving. When sensor replacement becomes necessary, professional service ensures continued system reliability.

If you’re dealing with a total loss vehicle, don’t hesitate to explore your options. Contact Zore’s Junk Cars at 317-450-3721 today and sell your scrap car for instant cash.

Get a Free Quote for Your Junk Car

Related Post: The Importance of Good Tire Inflation

Fuel System Repairs: Understanding the Costs and Processes

Your vehicle’s fuel system is the lifeline that keeps your engine running smoothly. Like the circulatory system in your body, it delivers the essential fuel your engine needs to operate efficiently. When this system fails, it doesn’t just leave you stranded—it can lead to costly repairs that might have you questioning whether your vehicle is worth fixing.

Understanding fuel system repair costs and processes empowers you to make informed decisions about your vehicle’s maintenance. Whether you’re dealing with a minor fuel filter replacement or facing a major fuel pump failure, knowing what to expect can save you both money and stress.

This comprehensive guide will walk you through common fuel system problems, repair costs, and help you determine when professional intervention is necessary. We’ll also explore preventative maintenance strategies and address the difficult decision of when repair costs exceed your vehicle’s value.

Call 317-450-3721 to Get a Free Offer From Our Junk Car Buying Service in Indianapolis Indiana

Common Fuel System Problems

Fuel system issues rarely announce themselves with dramatic fanfare. Instead, they often develop gradually, manifesting through subtle symptoms that can easily be overlooked until they become major problems.

Fuel Pump Failure

The fuel pump serves as your vehicle’s heart, circulating fuel from the tank to the engine. When it begins to fail, you might notice difficulty starting your car, engine sputtering during acceleration, or complete loss of power while driving.

Fuel pump replacement typically costs between $400 and $800, including both parts and labor. The wide price range depends on your vehicle’s make, model, and the pump’s accessibility. Luxury vehicles and those requiring extensive disassembly often fall on the higher end of this spectrum.

Clogged Fuel Filter

Your fuel filter acts as a guardian, preventing contaminants from reaching your engine. Over time, it accumulates debris and becomes less effective. A clogged filter restricts fuel flow, leading to poor engine performance, reduced fuel efficiency, and potential damage to other fuel system components.

Fortunately, fuel filter replacement is among the more affordable fuel system repairs, typically costing between $50 and $150. This relatively small investment can prevent much larger problems down the road.

Faulty Fuel Injectors

Fuel injectors deliver precise amounts of fuel directly into your engine’s combustion chambers. When they malfunction, you’ll experience rough idling, poor acceleration, and increased emissions. Each injector replacement costs approximately $150 to $350, and most vehicles have multiple injectors that may need attention simultaneously.

See How Our Junk Car Selling Process Works

Factors Affecting Repair Costs

Several variables influence the final cost of fuel system repair, making it essential to understand these factors before committing to any work.

Vehicle Make and Model

Luxury vehicles and imported cars often require specialized parts and expertise, driving up repair costs significantly. A fuel pump replacement on a Mercedes-Benz will likely cost more than the same repair on a Honda Civic. Additionally, older vehicles may require parts that are harder to source, increasing both parts and labor costs.

Type of Repair Needed

The complexity of your fuel system repair directly impacts the cost. Simple maintenance tasks like fuel filter replacement require minimal labor, while fuel pump replacement might necessitate dropping the entire fuel tank—a labor-intensive process that can take several hours.

Labor Costs

Labor rates vary significantly by geographic location and shop type. Expect to pay between $80 and $150 per hour for professional fuel system repair work. Urban areas typically command higher rates than rural locations, and dealership service departments often charge more than independent repair shops.

DIY vs. Professional Repair

The decision between attempting a DIY fuel system repair and seeking professional help depends on your skill level, available tools, and the complexity of the problem.

When to DIY

Simple maintenance tasks like fuel filter replacement can often be handled by mechanically inclined car owners. If you have basic automotive knowledge, proper tools, and adequate workspace, you might successfully tackle these straightforward repairs.

However, safety must be your top priority. Always disconnect the battery and wear safety glasses and gloves to protect yourself from fuel spills and electrical hazards. Gasoline is highly flammable, so work in a well-ventilated area and avoid sparks or open flames.

When to Seek a Professional

Complex repairs involving fuel pumps, injectors, or fuel system inspection require specialized knowledge and equipment. Fuel systems are intricate and sensitive—mistakes can lead to costly damage or safety hazards. Professional technicians have the expertise to diagnose problems accurately and complete repairs safely.

Additionally, DIY repairs may void your vehicle’s warranty, particularly if not performed correctly. When in doubt, consulting a professional protects both your safety and your investment.

Preventative Maintenance Tips

Proactive fuel system maintenance can prevent costly repairs and extend your vehicle’s lifespan. These simple practices can save you hundreds of dollars in future repair costs.

Regular fuel filter replacement according to your vehicle’s maintenance schedule prevents clogs and ensures clean fuel delivery. Use high-quality fuel from reputable gas stations to minimize contaminants that can harm your fuel system components.

Avoid running on empty—keep your fuel tank at least ¼ full to prevent the fuel pump from overheating and drawing in sediment from the bottom of the tank. This simple habit can significantly extend your fuel pump’s lifespan.

Schedule regular fuel system inspections with a qualified technician to catch minor issues before they become major problems. Address any symptoms promptly, such as poor engine performance or difficulty starting, to prevent further damage.

Consider using fuel additives or cleaners periodically to remove deposits and keep your fuel system clean. If you store your vehicle for extended periods, use a fuel stabilizer to prevent fuel degradation and component corrosion.

When Repair Costs Exceed Your Vehicle’s Value

Sometimes, fuel system repair costs can exceed what makes financial sense for your vehicle. This situation is particularly common with older vehicles or those that have experienced multiple system failures.

Total Loss Vehicles, Explained

When repair costs approach or exceed 51% of your vehicle’s market value, insurance companies night declare it a total loss. This threshold varies by insurer and state regulations, but it reflects the economic reality that extensive repairs may not be worthwhile.

For fuel system repairs, this situation might arise when multiple components fail simultaneously or when a rare, expensive part is needed for an older vehicle. Professional assessment can help you understand whether your vehicle falls into this category.

Benefits of Selling to a Junk Car Buyer

If you do not have insurance, a total loss vehicle must be given a salvage title. In this case, you would have to sell it “as is” to a private buyer, which may not deliver the maximum return. When your vehicle’s repair costs exceed its value, selling to a junk car buyer offers several advantages. These buyers typically offer between $75 and $500 depending on your vehicle’s condition and current market demand for parts and scrap metal.

This option eliminates the stress of finding auto salvage yards for a non-functional vehicle and provides immediate cash that can be applied toward a replacement vehicle. Many junk car companies, like Zore’s Junk Cars in Indianapolis, also handle towing and paperwork for free, making the process convenient and straightforward.

Ensuring Your Vehicle’s Future

Understanding fuel system repair costs and processes helps you make informed decisions about your vehicle’s maintenance and future. Regular preventative maintenance can prevent many costly repairs, while knowing when to seek professional help protects your safety and investment.

When repair costs become prohibitive, exploring alternatives like selling to a junk car buyer can provide a practical solution. The key is making decisions based on accurate information rather than emotion or wishful thinking.

If your vehicle is beyond economical repair, consider getting a no-obligation offer from Zore’s Junk Cars in Indianapolis. We provide fair, transparent pricing and handle all the details, making your transition to a new vehicle as smooth as possible.

Get Your Free Offer Now!

Related Post: Fuel Saving Tips That Will Boost Your Bank Account

Roadside Emergency Kit: A Checklist to Keep You Prepared

A roadside emergency can strike when you least expect it. Whether it’s a flat tire, a dead car battery, or an overheating engine, being prepared can turn a stressful situation into a manageable one. A well-stocked emergency roadside kit is more than a collection of tools and supplies; it’s your safety net for dealing with common roadside problems, protecting yourself, and staying comfortable while waiting for help.

This guide will walk you through the essential items your roadside emergency kit needs, seasonal customizations for Midwest weather, optional but highly useful tools, and maintenance tips to keep everything functioning when you need it most. Plus, we’ll provide advice for situations where it might be time to consider selling your vehicle if the damage is too severe to repair.

Call 317-450-3721 to Get Cash for Junk Cars in Indianapolis Indiana
Prepare Your Own Personal Car Kit for Roadside Emergencies!

Essential Items for Your Roadside Emergency Kit

Every roadside emergency kit should start with the must-have basics that address common automotive issues. Here’s what you should include:

Jumper Cables 

A dead car battery can leave you stranded, but jumper cables can bring it back to life when another vehicle is nearby to assist. Invest in heavy-duty cables long enough to connect two cars easily.

First Aid Kit 

Safety first and foremost. A basic first aid kit should cover minor cuts, scrapes, or burns. Pack essentials like bandages, antiseptic wipes, tweezers, and gloves to handle small injuries on the road.

Warning Devices 

Reflective triangles or LED road flares are crucial for alerting other drivers to your presence, especially at night or during poor visibility. Set them up 10 to 30 feet behind your vehicle to maximize safety.

Basic Tools 

A few key tools, like a tire jack, spare tire, torque wrench, and lug wrench, allow you to tackle basic repairs, such as changing a flat tire. A flashlight (with fresh batteries) is a must-have for working in dark conditions.

Additional Essentials: 

  • Water: Stay hydrated or use water for basic cleaning tasks. 
  • Coolant: Address an overheating engine quickly to avoid further damage. 
  • Reflective Clothing: Keep yourself visible to other drivers while working on your car. 

Seasonal Considerations for Roadside Assistance Kits 

Midwest drivers often face tough winters and sweltering summers, requiring seasonal additions to your kit.

❄ Winter Essentials 

  • Ice Scraper & Snow Brush: Remove frost and snow for clear visibility. 
  • Warm Blankets: Keep warm while waiting for help during subzero temperatures. 
  • Sand or Kitty Litter: These can provide traction on icy roads if you’re stuck. 
  • Hand Warmers: Keep these portable heat packs handy for extremely cold conditions. 

☀ Summer Add-Ons 

  • Sunscreen: Protect your skin if you’re stuck outside under the sun. 
  • Extra Water Bottles: Prevent dehydration on hot days. 
  • Cooling Cloths: Stay comfortable while working in the heat. 

Adapting your kit seasonally ensures you’re always prepared, no matter the weather.

Contact Us for Free Junk Car Towing!

Optional but Recommended Items 

If you want to go beyond the essentials, these additional items can provide added utility and peace of mind.

  • Fire Extinguisher – A small, vehicle-rated fire extinguisher can help in case of minor car fires caused by overheating or electrical issues.
  • Duct Tape – The ultimate quick-fix tool. Temporarily secure loose parts or patch minor leaks until professional repairs can be made.
  • Multi-Tool – A multi-tool combines pliers, knife blades, screwdrivers, and more into a single compact device, offering versatility for minor fixes.
  • Portable Jump Starter – Unlike traditional jumper cables, a portable jump starter doesn’t rely on another vehicle. It’s an invaluable backup for dead car batteries when you’re alone.

Budget Considerations for Every Driver 

Building a roadside emergency kit doesn’t have to break the bank. Here’s what you can achieve based on your budget:

  • Basic Essentials (Under $50): Focus on critical items like jumper cables, a first aid kit, reflective triangles, and a flashlight. 
  • Mid-Range ($50–$100): Upgrade to include a fire extinguisher, a multi-tool, duct tape, and some extra automotive fluids. 
  • Comprehensive Kits ($100–$200+): Include high-quality tools, a portable jump starter, premium road flares, and seasonal gear for ultimate preparedness. 

Regardless of your budget, prioritize what fits your driving habits and region’s weather conditions.

Maintenance Tips for Your Emergency Kit 

An emergency kit is only as good as its condition. To ensure it’s ready when you need it, follow these tips:

  • Inspect Regularly: Check jumper cables, flashlights, and tools for wear and tear. Replace them if needed. 
  • Monitor Expiry Dates: Verify that first aid supplies and food/water are still usable. Replace expired items promptly. 
  • Seasonal Updates: Adjust your kit’s contents to account for Midwest winter or summer conditions. 
  • Keep it Accessible: Store your kit in the trunk or cargo area, ensuring it’s easy to grab in an emergency. 

Taking the time to maintain your kit will save you from added stress during roadside emergencies.

Kit Variations for Different Drivers and Vehicles 

Not every roadside emergency kit should look the same. Tailor yours based on your vehicle type or driving experience:

  • For Cars: Opt for compact, lightweight items to save space. 
  • For Trucks/SUVs: Carry heavy-duty equipment like larger jumper cables and torque wrenches. 
  • For New Drivers: Choose pre-assembled kits with clear instructions for ease of use. 
  • For Experienced Drivers: Customize your selection with specialty tools for advanced repairs. 

Facing a Total Loss Car? Here’s a Plan to Get Paid Back

Roadside emergencies can sometimes lead to extensive damage, leaving your vehicle beyond repair and declared a total loss. In such situations, figuring out what to do next can feel overwhelming. If repairing your car isn’t an option, one practical solution is to sell it to an auto salvage yard like Zore’s Junk Cars in Indianapolis.

We specialize in buying junk cars, offering you cash on the spot, no matter the vehicle’s condition. Plus, we provide free in-house towing services, so you don’t have to worry about how to transport the car. This hassle-free process allows you to recover some value from your vehicle while avoiding the stress of trying to figure out what to do with it. It’s a quick and convenient way to move forward and let go of a totaled car.

Plan Now, Stay Safe Always 

Preparing an emergency roadside kit is one of the simplest yet most effective ways to ensure your safety and peace of mind while driving. From handling a dead car battery to managing seasonal challenges, your kit can make unexpected situations much easier to tackle.

Don’t wait until it’s too late. Take action today by assembling your roadside emergency kit and staying prepared for the road ahead.

If you have a junk car taking up space, why not turn it into cash? Indianapolis residents trust Zore’s Junk Cars for fast, reliable, and top-dollar offers on all makes and models—running or not.

Get a Free Junk Car Offer Now

Related Post: Avoiding the Money Pit: Understanding High-Cost Car Breakdowns